
We had a great first birthday party for our daughter Akira. We also planned for a professional photo-shoot for her first birthday. I was looking for photo prop ideas, when I found this post from Melanie @ It happens in a Blink . I used the idea to make my own birthday photo prop – the number ‘1’. This came out so good (and cheap!), that I have decided to make a number photo prop for every birthday of Akira!
Supplies
- Foam Board
- 20-30 Tissue Papers
- Hot Glue Gun
- Pen
- Precision knife
- Scissors
- Cutting mat (optional)
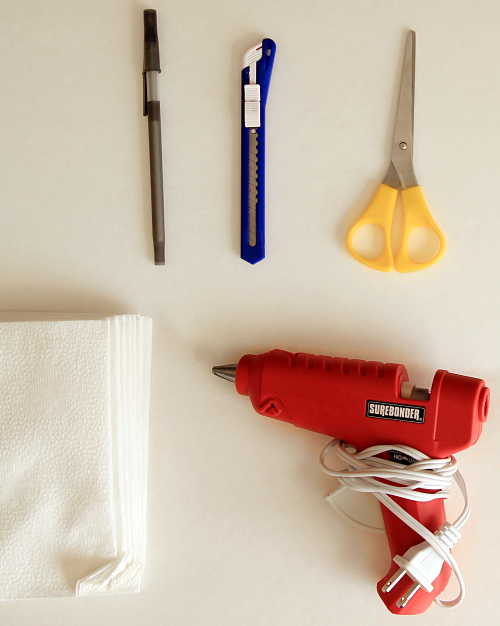
Yes! That is all it takes to make this inexpensive but camera-loving photo prop. I already had all the supplies with me, except for the foam board, which I bought from the Dollar Store for a dollar. So the whole project just cost me $1! It definitely looked more expensive and was totally worth it!
Steps to make the photo prop
- Create the number outline
- Cut out the number
- Cut out tissue paper circles
- Make tissue paper flower petals
- Glue the tissue paper flowers
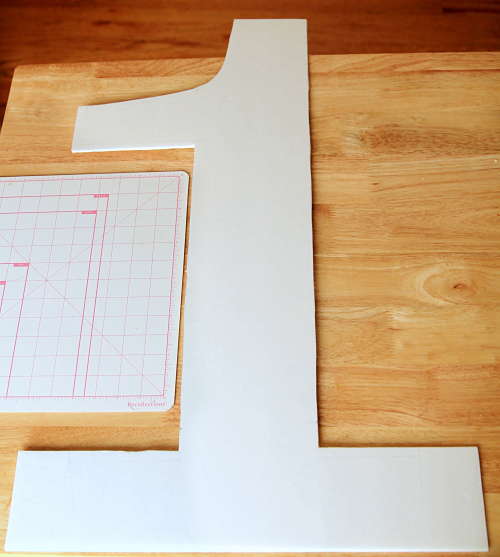
Pick up the foam board with the longer side aligned vertically, and mark the number ‘1’ on it using a pen. I wanted an oversized prop, so I used the complete length of the board. It did take me some trials to get the outline right.
Now using a precision knife (I used the one from Dollar Store), cut out the number shape from the board. This is where Vinay and I did lot of brainstorming – the curve is not right, the width is not right, the line is not straight. 🙂 Finally we settled for this shape.
TIP: Use a cutting mat underneath to save the work space from getting incision marks from the knife.
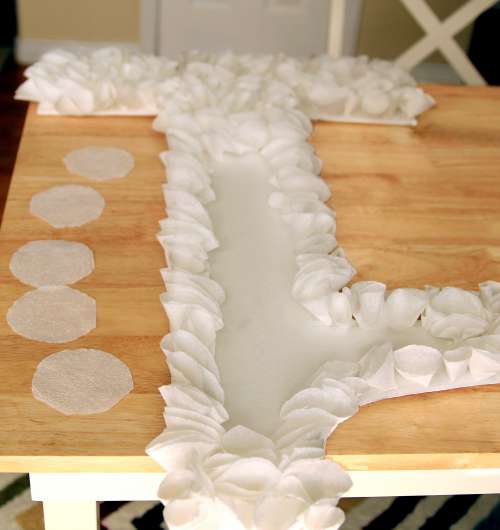
Draw 3 inch circles on folded paper tissues, utilizing the paper as much as possible. Using scissors, cut out the circle you marked, or, just use your best estimate to cut the circles. As you can see, you don’t need to cut out precise circles. I worked on 4-5 napkins at a time, to save some effort. I got 8 circles from 1 paper tissue and had to cut around 30 napkins. So depending on the size of your tissue paper and the prop shape, you might need more or less.
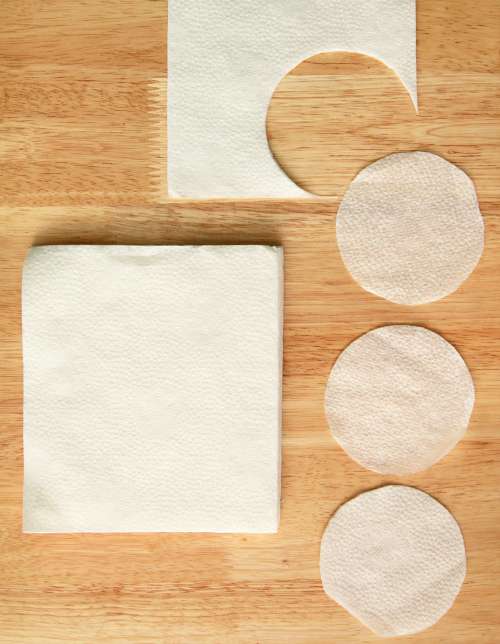
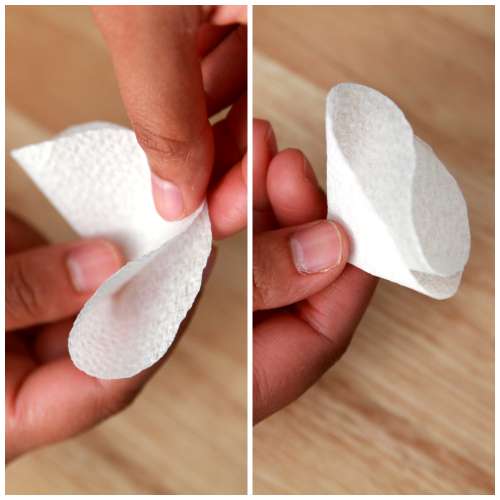
Pick a tissue paper circle and make quarter-folds without creasing it, just as shown in the picture below. Now it resembles a flower.
It is time to use the hot glue gun now. (Vinay really loves working with the glue gun. Aren’t they fun? Ummm….not until you burn your fingers with it!). Start gluing the flowers to the board, finishing the edges first. Keep repeating the process of making flowers and gluing them to the board, until the whole board is covered up. This is how our number looked like, midway in the process.
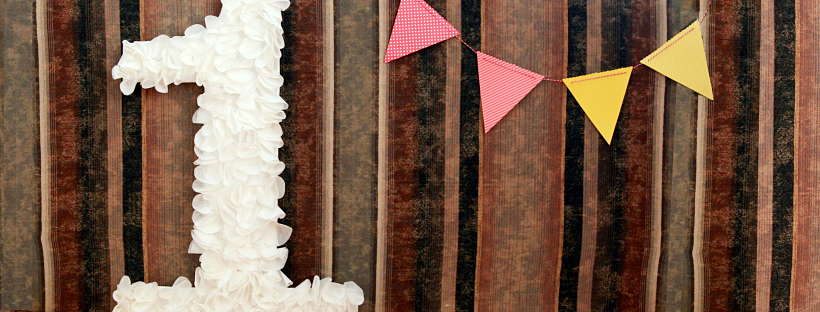
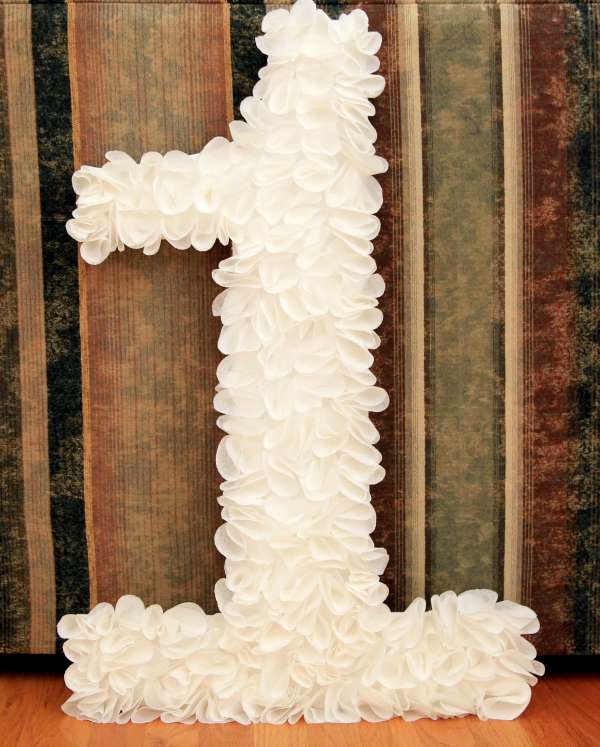
It took us just 1 hour to complete the prop! The most labor-intensive part of this project was making the flower petal cones and gluing them on the foam board. Hence I left this job for Vinay ;). Below is how it finally turned out. He did a great job at it, didn’t he?
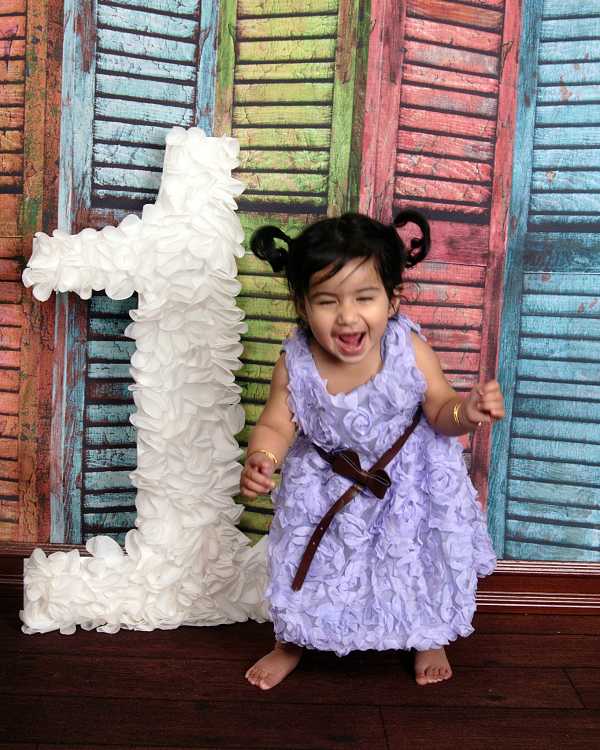
Finally it was time to use our photo prop. The number prop made the basic studio picture fun and unique, and Akira could not have been more excited to be 1!
So are you planning for a birthday photo shoot too? Will you make your own photo prop?
The article is very interesting and beautiful. As the baby in the picture is also happy, Thanks for sharing the tutorial through pictures. I am thinking to gift this type of something with my creativity on here coming birthday.