Cover Picture for Handprint Peacock Art ~15th August

Handprint Peacock Art – 15th August!

15th August is a special day for us, as it is India’s Independence Day. It is an even more special day for me, as it is my parent’s Anniversary date too! Since my mother is here visiting us, I thought of making a handprint painting with Akira for her. The choice was easy – India’s national bird – Peacock! So I started looking for handprint peacock ideas, when I found this post by Kelly @ Cobwebs, Cupcakes & Crayons. Here is how we made this fun colorful painting!

Handprint Peacock Art ~ Indian Independence Day

Supplies

  • Crayola Washable Kid’s Paint
  • Crayola Artist Brushes
  • Construction Paper
  • Elmer’s All-Purpose Glue
  • Colored Markers

Directions to make the Handprint Peacock

  1. Get your workspace ready. Cut a White Construction Paper in half.
  2. Paint your child’s hand with blue in the palm area and thumb. Then paint the fingers with light green color. Now press your child’s hand in the center of paper to get the handprint. Dont worry if your kid mixes the colors in his/her hand, it just give some extra shade to the painting.
  3. Now it is time for you to work on painting, unless your child is patient enough to complete the painting. (Mine got busy in making her own artwork). Using the yellow paint make the peacock beak. Then use your little finger to place yellow dots on the peacock plumage.
  4. Once the paint dries use the little finger again to make smaller blue dots on top of the yellow dots.
  5. Once the paint dries use a dark blue marker to make tiny dots on top of the previous dots.
  6. Use the green marker to make streaks for the peacock feather.
  7. Now using the color marker make the head crest, legs and eye of the peacock.
  8. Paste the painting on top of another colored construction paper using all-purpose glue to create a frame.

Happy Independence Day to all my Indian Readers!

So what did you do for your independence day?

Directions for making  Handprint Peacock!

Cover Picture for Baby Shower Gift Idea of Diaper Babies

Baby Shower Gift Idea – DIY Diaper Babies

Last month, we attended the baby shower of our friend in San Francisco. It turned out to be a great get-together with our friends who came from different locations for the surprise baby shower we all had planned! The soon-to-be-father had made a baby registry, but I skipped it to surprise both parents with my own baby shower gifts.

As a fairly new mom, I learnt a lot of “do’s and dont’s” from my friends and some from my own experiences. So I built a list of baby things I loved for my daughter in her first year, and used that as the shopping guide for the baby shower gifts:

DIY Diaper Babies ~ Baby Shower Gift Idea

Baby Shower Gifts List

  1. Pura Kiki feeding bottles
  2. I am in absolute love with these bottles. They come in such nice colors, are lightweight, unbreakable, easy to warm the milk in and the best thing – no plastic/BPA. So I got 2 5oz bottles and 1 11oz bottle for them to try.

  3. Munchkin Bottle Drying Rack
  4. One thing which the new parents need to get used to besides breastfeeding and diaper changes is washing the feeding bottles. Once you have washed or sterilized the bottles, you need a place to dry them. I found this rack really handy as it holds a lot without occupying much space. Easy to clean and foldable for storage.

  5. Babyganics Diapers
  6. Actually I did not know that environment friendly disposable diapers existed before I went for shopping to Target. I heard good reviews about them, and thought that they are worth trying. And now that I know, it is time to switch my daughter’s diapers too.

  7. Baby Socks
  8. These tiny little things keeps your baby warm and cozy in the tender initial stage. Since my friends were having a baby girl, I selected a set with appropriate colors and prints.

  9. Baby Washcloths
  10. You cannot get enough of them. You need it for the drool, the milk, baby bath or oh well, any other mess!

  11. Gift Basket
  12. I wanted a basket to put together the diaper babies, and I found just the right one at Target. This could convert to diaper or wipes holder for their diaper changing station.

  13. Baby book
  14. It is never too early to start reading to your baby. I like the “Bubbles Bubbles” book from Sesame Beginnings which I got from Dollar store.

  15. Plush Turtle Toy
  16. The gift basket is incomplete without a snuggly and softy plush toy or blanket. So I got this set of turtle blanket and plush from Costco.

  17. Baby Dress
  18. I assumed that the soon-to-be-parents will receive lot of pretty dresses for the little one. So I bought a pair of leggings with a top ‘Beauty in Bloom’ for their everyday use. It was not dressy, but was still so cute and perfect for my stylish friend’s daughter!

DIY Diaper Babies ~ Baby Shower Gift Idea

Diaper Babies Gift Presentation

Once my shopping was done, it was time to make it presentable. So using the diapers, rubber bands, baby socks, baby washcloths and black marker we made these adorable diaper babies. Actually Vinay made them, as he is the swaddle master! 😉
Here are the quick and easy directions for you:

  1. Roll the diapers tightly and secure using a rubber band.
  2. Roll the diapers to make the Diaper Babies as a Baby Shower Gift

  3. Pull a baby sock at one end of the diaper. This will act as the baby’s warm cap.
  4. Use socks as cap for Diaper Babies - Baby Shower Gift

  5. Swaddle and cover the other end of the diaper by using a baby washcloth, just how you would swaddle a baby.
  6. Swaddling Steps to make Diaper Babies as a Baby Shower Gift

  7. Finally use the black marker or stickers or googly eyes to make the eyes of the baby.
  8. Finished Diaper Baby as a Babyshower Gift

I made 4-5 diaper babies and placed them in the basket. Since the basket was deep, I used some diapers and the dress set to act as fillers and raise the bed of basket. I placed the babies on front side of the basket. They were supported by feeding bottles from the back side, which looked like little babies too, with their caps on. Whatever items were left out, I placed them in a separate gift bag to give along with this cute little gift basket. Everyone loved these diaper babies. In fact, the would-be parents did not even want to remove them from the basket 🙂

Are you planning to attend a baby shower too? Will you be making these diaper babies?

Cover Picture for Handprint Lion Keepsake - 5 for Big Cats!

Handprint Lion Keepsake Craft – 5 for Big Cats

Since the death of beloved lion Cecil, we have been wanting to do a lion painting with Akira to show our support for the cause of saving innocent endangered animal species.
So we made this painting yesterday with all the supplies I had handy. As it turned out, it was the most opportune time to make it. I was not aware that today, i.e. 10th August, is National Lion Day and National Geographic has come up with its High Five, Give Five campaign.
So I did modify the message of painting to ‘5 FOR BIG CATS’ and it just could not have been a better virtual high five! We have done our bit, but please do join us in the uproar! Share your virtual high fives using #5forBigCats and donate to the campaign!

Handprint Lion Keepsake - 5ForBigCats campaign

Supplies

  • Crayola Washable Kid’s Paint
  • Crayola Artist Brushes
  • Construction Paper
  • Mod Podge
  • Foam brush
  • Colored Markers

Supplies for Handprint Lion Keepsake

Directions to make the handprint lion

  1. To start with, cut a white Construction Paper in half. Then mix a little of orange and yellow paints to get the desired shade for the lion’s body.
  2. Paint your child’s hand in the paint mix and press it in the center of paper to get the handprint. It took me 3 attempts to get it right as Akira was not co-operating 🙂
  3. Flip the handprint vertically so that the fingers are pointing down. The fingers make for 4 legs of the lion and the thumb becomes the tail. Now using the leftover paint mix, paint the tail tuft at end of the thumb. At the opposite side, paint a circle to make the head. Also, paint some streaks around circle to make the mane of the lion.
  4. Mix some brown with the yellow paint to create a light brown shade. Now apply it in streaks on lion’s mane and tail tuft.
  5. Apply white paint dots to make the eye sockets of the lion.
  6. Finish off the painting using brown color marker to make the eyes, nose, ears and paw nails.
  7. After the paint dries, stick the paper on top of another colored construction paper using craft glue or mod podge. Now your painting is framed, just sign it!

Directions for making Handprint Lion Keepsake - 5 for Big Cats!

So are you ready to show off your virtual high five for the big cats?

Cover Picture for DIY project on First Birthday Number Photo Prop

DIY First Birthday Photo Prop – Number One

We had a great first birthday party for our daughter Akira. We also planned for a professional photo-shoot for her first birthday. I was looking for photo prop ideas, when I found this post from Melanie @ It happens in a Blink . I used the idea to make my own birthday photo prop – the number ‘1’. This came out so good (and cheap!), that I have decided to make a number photo prop for every birthday of Akira!

Supplies

  • Foam Board
  • 20-30 Tissue Papers
  • Hot Glue Gun
  • Pen
  • Precision knife
  • Scissors
  • Cutting mat (optional)

Cut-out of number 1 for Birthday Photo Prop

Yes! That is all it takes to make this inexpensive but camera-loving photo prop. I already had all the supplies with me, except for the foam board, which I bought from the Dollar Store for a dollar. So the whole project just cost me $1! It definitely looked more expensive and was totally worth it!

Steps to make the photo prop

  1. Create the number outline
  2. Pick up the foam board with the longer side aligned vertically, and mark the number ‘1’ on it using a pen. I wanted an oversized prop, so I used the complete length of the board. It did take me some trials to get the outline right.

  3. Cut out the number
  4. Now using a precision knife (I used the one from Dollar Store), cut out the number shape from the board. This is where Vinay and I did lot of brainstorming – the curve is not right, the width is not right, the line is not straight. 🙂 Finally we settled for this shape.

    TIP: Use a cutting mat underneath to save the work space from getting incision marks from the knife.

    Cut-out of number 1 for Birthday Photo Prop

  5. Cut out tissue paper circles
  6. Draw 3 inch circles on folded paper tissues, utilizing the paper as much as possible. Using scissors, cut out the circle you marked, or, just use your best estimate to cut the circles. As you can see, you don’t need to cut out precise circles. I worked on 4-5 napkins at a time, to save some effort. I got 8 circles from 1 paper tissue and had to cut around 30 napkins. So depending on the size of your tissue paper and the prop shape, you might need more or less.

    Tissue Paper Circles for Birthday Number Photo Prop

  7. Make tissue paper flower petals
  8. Pick a tissue paper circle and make quarter-folds without creasing it, just as shown in the picture below. Now it resembles a flower.

    Paper Tissue Flowers for Birthday Number Photo Prop

  9. Glue the tissue paper flowers
  10. It is time to use the hot glue gun now. (Vinay really loves working with the glue gun. Aren’t they fun? Ummm….not until you burn your fingers with it!). Start gluing the flowers to the board, finishing the edges first. Keep repeating the process of making flowers and gluing them to the board, until the whole board is covered up. This is how our number looked like, midway in the process.

    Glued Paper Tissue Flowers for Birthday Number Photo Prop

It took us just 1 hour to complete the prop! The most labor-intensive part of this project was making the flower petal cones and gluing them on the foam board. Hence I left this job for Vinay ;). Below is how it finally turned out. He did a great job at it, didn’t he?

First Birthday Photo Prop - Number 1

Finally it was time to use our photo prop. The number prop made the basic studio picture fun and unique, and Akira could not have been more excited to be 1!

Akira in her First Birthday Photo-shoot with Number 1 Photo Prop

So are you planning for a birthday photo shoot too? Will you make your own photo prop?

Cover Picture for First Year as Homeowner

What I learnt in my First Year as a Homeowner

For those of you, who have just bought your first home, congratulations! For those planning to buy one, exciting times are ahead for you! For all the others, please read and enjoy while I take you through my last year’s journey at our first home 🙂

3rd of July marks a big milestone in our life. We moved-in to our first home that day last year. Looking back at it, it feels so nostalgic!

This post is not intended to be a home buying guide. Rather, it is intended to share our learnings from the first year of home ownership. Hope it enlightens any of our friends who are buying a home for the first time.

Learnings as a first-time homeowner

So you ‘have’ or ‘will have’ your own house soon, probably a yard or a pool too. Maybe it’s your starter home or your dream home, but it’s your own. You have put your sweat and blood to get to it. But what is next? It all looks rosy when you buy the place, but once you move in, you realize how daunting little home activities become. Following is my list of things which I learnt in my first year:

  1. Strict Budget Planning
  2. Chances are that you have put down all your savings for the down-payment (If not, then you are really lucky or hard-working or both). Even if you have enough money for the down-payment or installments, it is a good idea to save some money each year and pay towards your loan. It makes a drastic difference to the end interest you will be paying. Plus don’t forget about all the home shopping you need to do. You probably have to cut-down on some of your spendings or at least plan your budget.

    TIP: Budget your spendings and try to put some amount towards your loan.

  3. Cleaning
  4. Most probably you are moving into a bigger place than you are living in right now. That means more cleaning and more maintenance! This will take more time out of your daily routine now. And if you have a 1 year old, there is no dearth of chores 😀

    TIP: Clean at frequent intervals instead of doing it all at once. Have a target for each week, such as kitchen, storage, windows etc.

  5. Yard work
  6. I was really happy to get a big yard with our home. It meant kid’s playarea and our party area! But what I was not prepared for was all the yard maintenance and cleaning. And with all the rain we have been getting, the lawn and weeds just grow exponentially. You have to mow the lawn at least every 10 days. Trimming the trees in the spring also took us some time. Not to forget about all the tools you need for all this work – lawn mower, weed sprayer, lopper, cultivator, saw etc. Thanks to our neighbors who let us borrow some of the tools.

    TIP: Do some yard work every week instead of piling it up, as it just doubles the work. Use weed killers early in the season, to prevent the growth of the weeds. Make friends with your neighbors. 🙂

  7. Pest Issues
  8. After 3 years, we are finally drought free this time, thanks to all the rain that we received this year. But with rains come all kinds of insects and pests. We did get lot of ants this time, but they went away after I used the ant spray on them. But there are so many other factors which can cause them to reappear; if not from you, from your neighbors. And with kids around, you just have to be careful about them.

    TIP: If you have a lasting pest problem it is worth taking help from professionals. You can also find plant based pest control treatments which are safe to use around kids.

  9. Overnight Parking
  10. We have a 2 car garage plus a driveway to park our cars, but parking can be tricky depending on which area, city or community your house is in. We were so busy arranging the house in our first week of moving-in that we totally forgot we had parked our car on the curbside beside our house. So next day we found a warning ticket on our car for overnight street parking. But HOA rules may differ on this, so check yours.

    TIP: Read the HOA Rules.

  11. Holiday lights
  12. To make the holiday season memorable at our new home, we put in a lot of effort on decorations and lighting. But what we did not know was that they had to be removed by the January month end. We were not aware of this and since we were not using them after Jan, we thought we will remove them when the weather is not too cold and icy. But we got to know the rules the hard way, when we received a HOA notice for the violation.

    TIP: Read the HOA Rules. 🙂

  13. Things you ignore while buying
  14. There will be lot of small issues which you will find when you move in. Our kitchen looked really nice during the walk through, but when we moved in I realized that the countertop was tiled instead of a single granite slab. If you did not notice them before you moved in, chances are, you can live with them. But if you cannot, plan for some DIY projects.

    TIP: Do not try to fix everything when you move in. You can plan for a small renovation or DIY projects, later.

  15. Automatic Sprinkler System Failure
  16. Automatic sprinkler systems are a great investment for a home, specially if you have big lawn area. But you don’t get to know its real value until one of the pipeline bursts. Yes, a classic newbie mistake! We did not know that the sprinkler system had to be drained out before the arctic cold freezes everything in Denver 🙂 And paid the price with burst pipes outside the home. Lucky for us, my husband’s timely intervention saved us from a flooded basement.

    TIP: Turn off the sprinkler system and drain out all the water before reaching freezing temperature. Take some external help for clearing out the sprinkler system or use a compressor to do it yourself. And if by chance you have not yet fixed the sprinkler or you don’t have one, buy a sprinkler set which can be attached to the hose. They are really cheap and useful for hands-free watering.

  17. Trash Removal
  18. During our first week, we did not know about the trash removal day. Thanks to our neighbor who welcomed us with cookies and explained the process to us. We did take out the trash before the pickup, but still got a notice for not putting it out on time. So be punctual about getting the trash out and read the HOA rules!

    TIP: Read the HOA rules, make friends with your neighbors and Recycle!

  19. Plumbing issues
  20. Gone are the days when you could call a maintenance person, who will come to fix that broken tap, pipe or flush for you. You still can call for professional help, but now you have to pay for it! We have had a problem with the toilet handle which remains in the flushed position until you lift it up. But as lazy as we are, we are still living with the workaround. Maybe we will learn how to fix it in our second year 😉

    TIP: Well not much here except, don’t let your drains get clogged, will save you from a lot of trouble!

  21. Cement deck issues
  22. We have a cemented deck in our backyard. But due to settlement of the soil, the deck has started showing some cracks, which is quite common in our area. I initially had my mind set on wooden deck and was planning to replace our cemented deck. But my colleague friend Phil explained to me how a cemented deck is easier to maintain and can look just as nice as wooden decks by staining or stamping techniques.

    TIP: Wait for 2-3 years for the soil to settle and then get the cement repair or treatments done.

  23. Appliance maintenance
  24. The home appliances and equipments get old and there will always be the regular wear & tear. We were aware of the fact that our water heater was at the end of its life during our inspection. So it did not come to us as a surprise when the heater started leaking. We had to get it replaced along with some corrections to bring the whole water heater assembly up-to the state regulation code. This meant $500 out of pocket beyond amount paid by our home insurance coverage .

    TIP: Account for appliance maintenance and repair/replacement costs. Buy home warranty to be on the safer side – a one-year service agreement that covers the repair or replacement of many major home system components and appliances that typically breakdown over time due to normal wear and tear.

    Benefits for a first-time homeowner

    But a home is not just all work, it is fun too! Following are some of the things I enjoyed in my first year:

    1. I am not draining away my money on the rent, instead I am building a valuable asset.
    2. Now each of the family member has his/her own room, besides the guest room and office.
    3. Now we have our separate bathrooms plus a powder room for guests.
    4. We have a big kitchen space to enjoy cooking and family meal time.
    5. We have decorated and painted the house, as we like it.
    6. We do not have to go outside for laundry!
    7. We have a big yard where kids can play all day.
    8. We have a big deck to host the grilling parties!
    9. We have 2-car parking garage, which fits 2 of our cars and a motorbike.
    10. We can choose our own providers for cable or internet.

    This is definitely not an all-inclusive list or may not be applicable for everybody. This is just to emphasize that buying a home is a big commitment and you need to make sure you are ready for it. And once you have decided to buy one, it is the beginning of exciting times!

    So are you planning to buy your first home? Or do you have some tips for me for the second year? 🙂

20 Ways to Wear Floral for the Spring-Summer Season

Spring is gone and summer is in full swing, but the floral trend is here to stay. Florals are all about having fun with fashion and embracing the joy and romance of the season. You can wear floral in printed pants, dresses, skirts, sunglasses – you name it! So here is my roundup of 20 ways to wear the floral trend this season.

  1. Flower Crown
  2. How about crowning yourself with a flower headband! It adds romanticism to any outfit. Do not limit them to music festivals or beach vacations. Try it with an everyday look, like a simple maxi dress.

  3. Floral Sunglasses
  4. Go back to the look of swinging 60’s with the retro flower print sunglasses. These are so much fun and must-haves.

    Floral Sunglasses

    Sunglasses from G.H. Bass & Co (similar here, here and here)

  5. Floral Jewelry
  6. Wear a statement floral jewelry such as necklace or ring or earrings to add color and fun to even a simple outfit like jeans and a T-shirt.

  7. Floral Top
  8. Add a playful touch to the outfit by wearing a silky or breezy floral top. Keep the focus on the print, by pairing it with a simple or solid bottom.

    Floral Silk Top

    Silk Blouse from Splash India (similar here, here and here)

  9. Floral Skirt
  10. Show off some leg in a flirty flower print skirt! You can pair it with a solid or matching striped top. Wear it with booties to add a little edge to it.

    Accordion Skirt from LOFT Outlet

    Accordion Skirt from LOFT Outlet (similar here, here and here)

  11. Floral Dress
  12. Wear bold and vibrant print with flowers, all over the dress. You can make it edgier by pairing it with a jacket or boots. You can even dress it up by wearing heels. (Yes it does snow here, even till May!)

    Floral Swing Dress from ASOS

    Swing Dress from ASOS (similar here, here and here)

  13. Floral Socks
  14. I love this trend of socks with sandals. Just pair up some flower printed socks with strappy chunky heels. This boy-meets-girl look balances style, comfort and fun. You can even try vice-versa, i.e., plain or lace socks with floral heels. This trend is not for everyone or for every occasion, but it is definitely worth a try.

  15. Floral Handbag
  16. Add a bright burst to your spring-summer style with a floral bag. Co-ordinate the colors with the rest of your outfit to enhance the print.

  17. Floral Sneakers
  18. Floral sneakers are a fun way to incorporate the trend. Wear them with a pair of jeans or T-shirt for that casual day out, or pair them up with a solid dress to give it a sporty edge.

    Floral Sneakers from H&M

    Sneakers from H&M (similar here, here and here)

  19. Floral Heels
  20. Add some grace and feminine touch to your outfit by wearing floral heels. Pair it with a pair of jeans to make it dressier or wear it with a solid dress.

    Guess Lavonna Pump

    Guess Lavonna Pump (similar here and here)

  21. Floral Pants
  22. Wear some bold floral printed pants to make it whimsical and fun. Play around with different colors, tops and jackets to keep it effortless and chic.

    Floral Leggings from H&M

    Leggings from H&M (similar here and here)

  23. Floral Belt
  24. Add an extra charm to your skirt or bottom by pairing it with a matching floral belt. You can even wear a contrasting belt to add some color pop to the outfit.

    Floral Belt from Loft

    Corsage Belt from Loft (similar here, here and here)

  25. Floral Coat
  26. Wear an abstract flower print coat to add a professional touch to your outfit. Pair it with rest of the outfit to bring out the colors from the coat. Here I have paired a lime colored skirt with the pixellated print coat from Zara.

    Pixellated Flower Print Coat from Zara

    Pixellated Flower Print Coat from Zara (similar here and here)

  27. Floral Cover-up
  28. A flower print cover-up makes us want to be closer to a beach. It is a must-have for a beach vacation.

    Flower Print Cover-up from Victoria's Secret

    Flower Print Cover-up from Victoria’s Secret (similar here and here)

  29. Floral Shorts
  30. Ditch your denim or cargo shorts for the pretty flower print shorts. Pair it with a solid top to bring out the pattern.

    Floral Shorts from Express

    Shorts from Express (similar here and here)

  31. Floral Cap
  32. Wear a standout flower print cap to top off your look. It is specially helpful for those bad hair days 😉

    Floral Chambray Baseball Cap from Old Navy

    Chambray Baseball Cap from Old Navy (similar here and here)

  33. Flower pin
  34. Add some glam to your everyday top or outer layer by using a pretty flower pin, like I have converted my basic white tee below.

    Flower Pin from Loft Outlet

    Flower Pin from Loft Outlet

  35. Floral Scarf
  36. Scarves are not just for winter! A lightweight floral scarf is a great way to add a touch of color to your plain summer-spring outfit. It can double as a sun protectant as well. 😉

    Floral Scarf from Forever 21

    Scarf from Forever 21 (similar here, here and here)

  37. Flower Nail Art
  38. How about adding a fresh flower print nail design to your manicure! You can do some DIY nail paint or use some Printed Nail Polish strips.

    Flower Nail Art

    Flower Nail Art

  39. Floral Umbrella
  40. Whether it’s the rain or the scorching sun, the floral umbrella protects you in style!

So how are you wearing your florals? Maybe a floral jacket or a jumpsuit or a swimsuit?

Hooked On Papa Painting For Father's Day

Hooked on Papa – Father’s Day Gift Idea

It was Father’s Day, and I had not thought about what we would be doing. We did have a special pancake breakfast, but other than that, it was going on as any other usual day. Right then, I saw this post from Stacey @ Glued to My Crafts, and I knew immediately that I wanted to make one. It was such a cute and simple idea, but just perfect for the day.

Gather the Supplies

I had most of the supplies from my previous craft work, but had to buy the paint and brushes. So I sneaked out to buy some paint for this last-minute project, while Vinay was out running his errands. I used construction paper, but you could also do it on a canvas. Here are the supplies I used

1. Crayola Washable Kid’s Paint
2. Crayola Artist Brushes
3. Construction Paper
4. Mod Podge
5. Foam brush

Supplies for Hooked on Papa Painting

Paint It

To tell you the truth, I probably have not painted in 15 years (Why now? Well things change when you have a little baby!). So this was one easy and fun project to warm up with. Here are the simple steps:

  1. To start with, I cut the white Construction Paper in half, width-wise.
  2. I took the blue color and added a bit of white to lighten it. Then just rolled my brush making waves with blue on the paper.
  3. Took out some green paint and made some water plants using the flat brush.
  4. Then came the fun part! I had to make a fish from Akira’s hand print. Now try doing that with 1.5 yrs old kid, who just woke up from her sleep! But once I dipped her hands in the orange paint, she was all set to play with colors. That is where my mom had to help me out. She held her tight, while I took her hand-print on paper. After that I washed her hands thoroughly to remove all the paint from her hands.
  5. Then I just used some red color to make the mouth of the fish.
  6. Used some leftover green paint to make the eye of the fish.

This is how the painting looked at this point

Water Paint for Hooked on Papa

Frame It

Once the paint was all done and dried out, it was time to frame it! I used the purple color paper to make a frame for our painting. Since I did not have any craft glue with me, I used some thinned down Mod-Podge using the foam brush, which worked just as well.

Hooked on Papa Painting with Frame

Finish It

Then it was time to finish it with words “I’m Hooked On Papa” and artist’s signature “Akira 2015”. 😉

You can also use paint or stickers. I did not have black paint, so I used the sketch pens instead. You could also say “Happy Father’s Day” or “Daddy’s Best Catch”. Or how about making it as a birthday gift – “Happy Birthday Daddy!”.

Finished Hooked on Papa Painting

Enjoy the Father’s Day!

Vinay came back home that day to be happily surprised with this cute little painting. I tried to capture their smiles, but Akira was not happy that we took her away from her mischiefs. Don’t go by the picture, she is absolutely hooked on to her papa 🙂

Finished Hooked on Papa Painting

How did you you celebrate this Father’s Day?

First Birthday Party Planning

How to plan your baby’s first birthday party

The last one year has gone by in a flash and before you know it, your baby will be a year old! Your baby does not even understand the meaning of a birthday yet, but you want to make his/her first birthday most memorable. And you have never planned or organized a birthday celebration before. You have so many questions in your mind. Whom should I invite? When and where should I have my party? How can I organize a good party without denting my bank balance? Look no further, here is a step-by-step planning guide to ensure that you have a fun party which everybody can enjoy.

Decide the Guest List

Ask yourself –

  • Do I want a private party with only my immediate family and near & dear ones?
  • Do you want to go all out with a big birthday bash?
  • Have my extended family, friends and co-workers had a chance to meet my baby?
  • How much budget do I have?

Answers to these questions will be based on your personal preferences. Maybe you want both a private party and a birthday bash.
To get started with the guest list create your own must-have, maybe, maybe-not list. You can then prune these lists based on the budget and head count.

Decide the Event Time

Ask yourself –

  • Is the birthday on a weekend or a weekday?
  • Which day will most of my must-have guests be available?
  • Do I want it to be a morning or an evening event?
  • Will it be a full-day affair?
  • What is your baby’s nap time?
  • What time is your baby most active or happy?

To get maximum attendance for the party, you need to plan it on a weekend. So if baby’s birthday falls on a weekday, then either the weekend before or after can be a good bet. It will be ideal to plan the party after baby’s nap time, as then (s)he will be well rested. Even if your kid is the most outgoing kind, they all get over-stimulated by the noise, crowd and new surroundings. So having a full day party is generally not a good idea, as you want your baby to have fun too, right!

Decide the Event Venue

Ask yourself –

  • Do I want to host the party at home?
  • Do I have enough space to host the party at home?
  • Do I want an outdoor party?
  • What is the average weather on the event day?
  • In which region or city are most of the guests staying?
  • What is my budget for renting a party space?

Throwing a party at home can be a good option when you have a close group of people coming over for the party or if your house has enough space to host a big party. This will help you save some money which you would have otherwise spent on renting a space. Guests can stay longer and you get to spend some quality time with them. Baby is also familiar with the place and can take some rest when he/she needs it. But if you decide to rent a restaurant or a party hall, then you don’t have to worry about the clean up of the space before/after.

Does the weather permit an outdoor party at that time of year? Why not have a garden party or a pool party or a picnic in the park – they are all such fun ideas and you can enjoy the outdoors over picnic food or grill, while the kids can enjoy the play structures, if one is available. You might have to enquire about permit issues with the authorities.

You also want the location to be easily accessible for the majority of the guests, your budget permitting.

Choose a Birthday Party Theme

Ask yourself –

  • Is there a toy or teddy that my kid likes to snuggle with?
  • Is there a color or fruit my baby likes?
  • Is there a book he/she likes or I like reading to my baby?
  • Is there a cartoon character that my baby likes?
  • Do I want games for kids in the party?

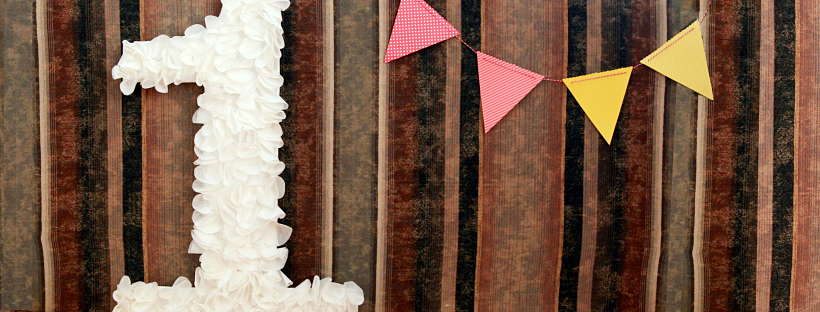
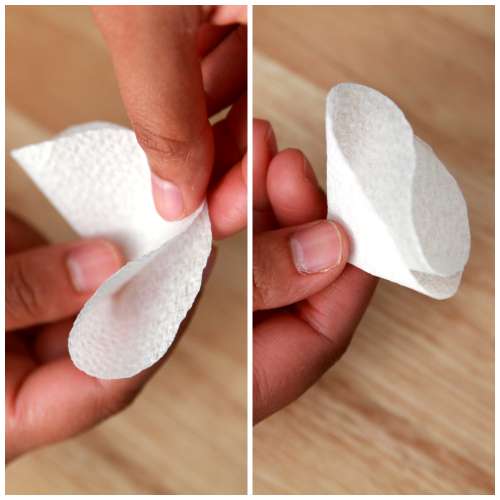
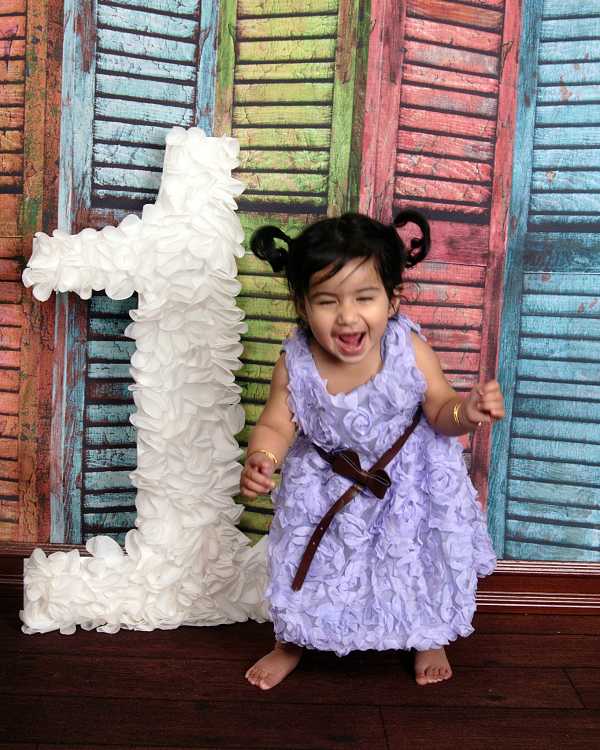
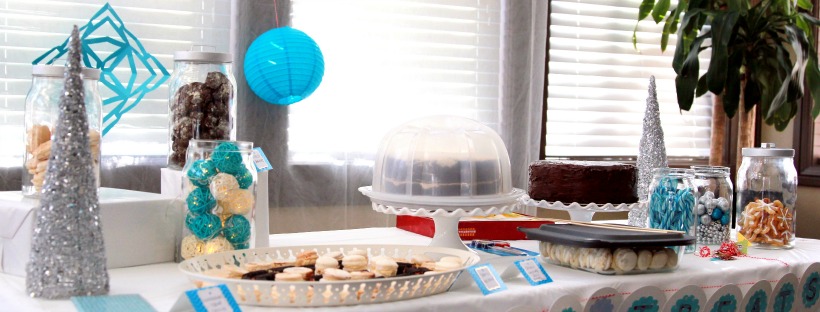
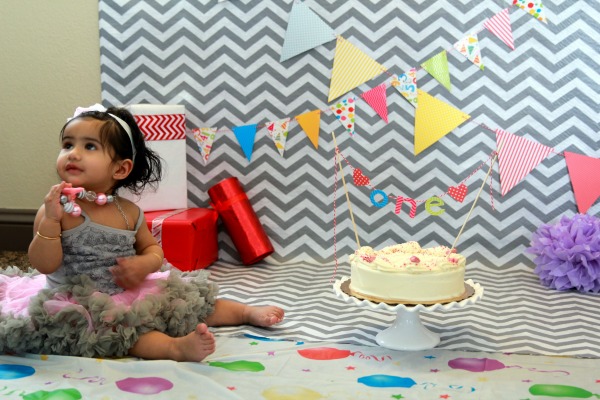
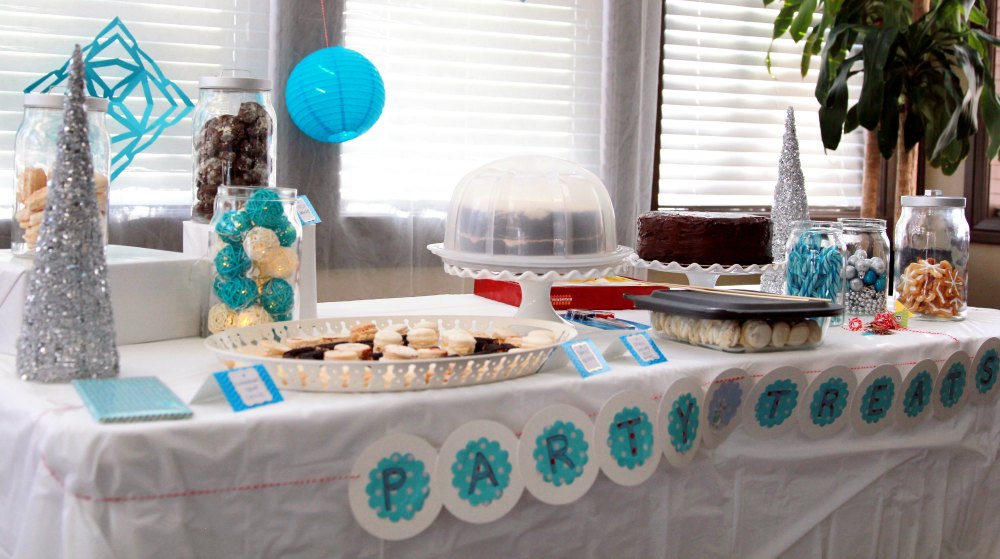
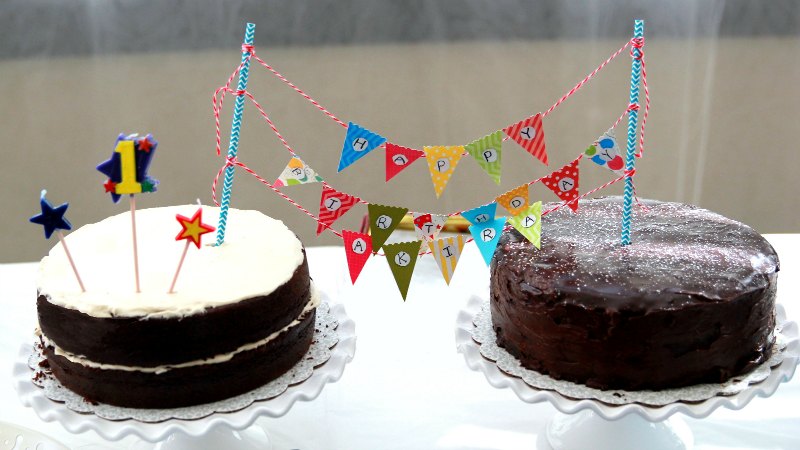
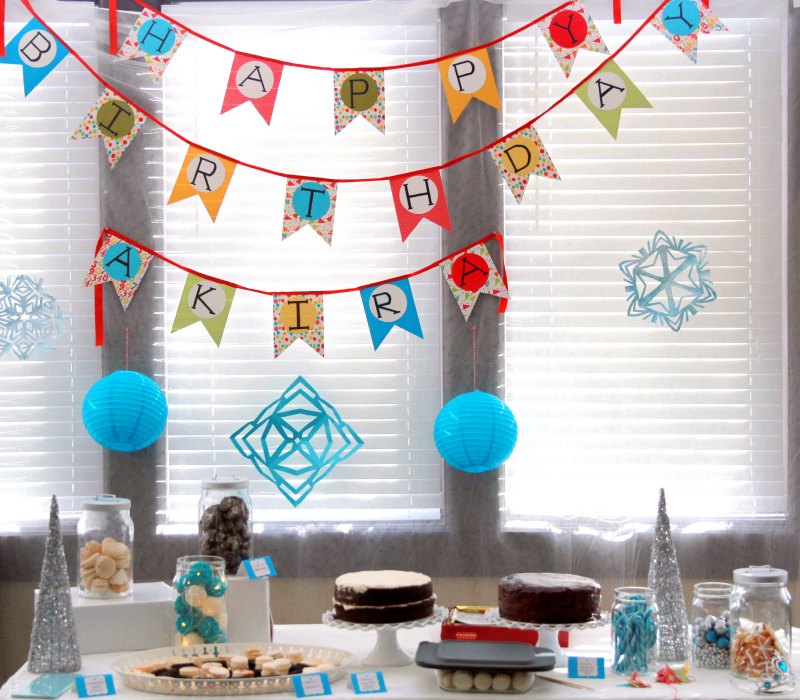
You can select a theme based on any of the above answered questions. If you are not sure, then you can always select the theme based on a color or a season or anything you fancy! Maybe you found some nice idea on Pinterest. Then plan for  the decorations around the theme. Maybe you want a theme which can be photographed well. You can also add games for kids to your party theme, it keeps the kids involved and have fun. Also, there is a latest trend to have a cake smash and splash party for the first birthday. Our upcoming post will talk more about that!

Send the Invites

Ask yourself –

  • What is the guest count?
  • Is it feasible to send personal mail invites?
  • Do I want to send a personalized electronic invitation with RSVP?

How you want to send the invite is a personal choice. But if you have a huge guest list, then sending mail invitation may not be a financially viable option. Electronic invitations work just well for most of the situations.

Plan the Budget and DIY

Ask yourself –

  • What is my max budget and what is my ideal expense amount?
  • How much time do I have for all the preparations?
  • Is there a sale going on before the party?
  • Do I need new set of clothes?
  • Do I have all the baking and craft supplies I need for the DIY projects?

Your Budget for party = Party place rental (optional) + Food + Clothes (optional) + Decorations + DIY supplies(optional) + Party Favors
If you know what you will need for the party, then it is a good idea to shop ahead, in order to save some money. If you are lucky to have the birthday around the holiday or sale season, then make the most of it 🙂

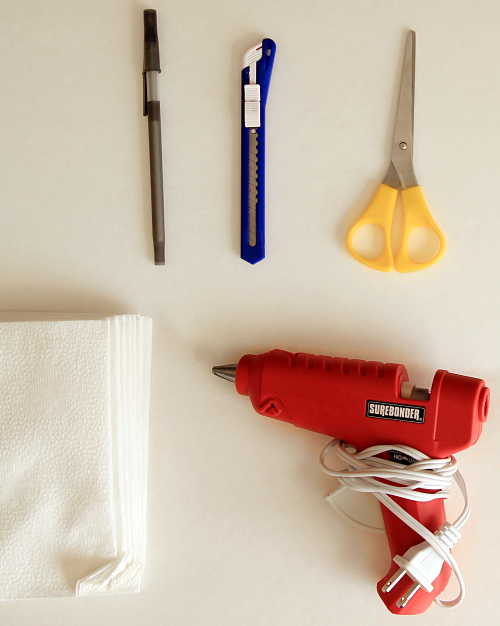
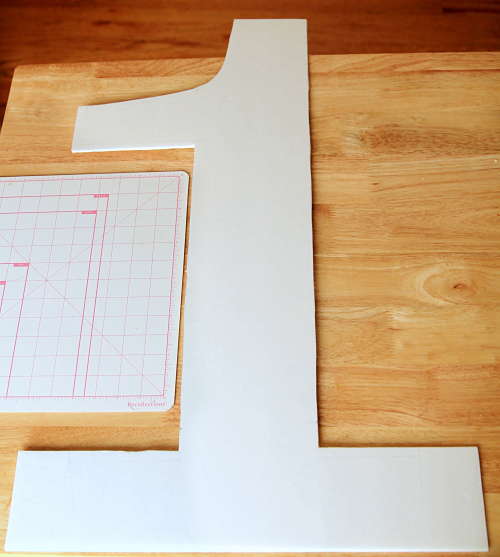
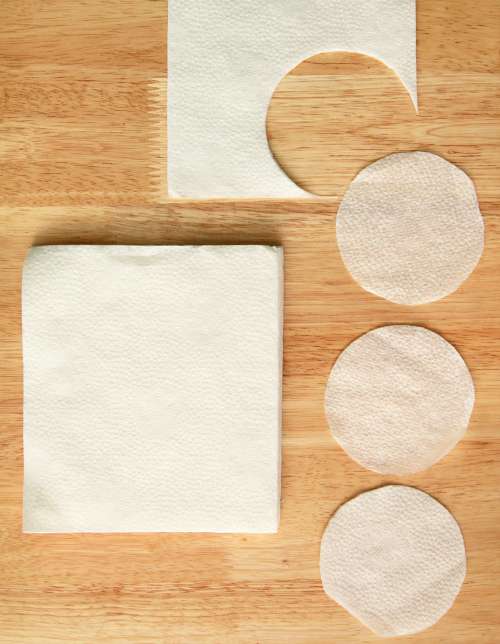
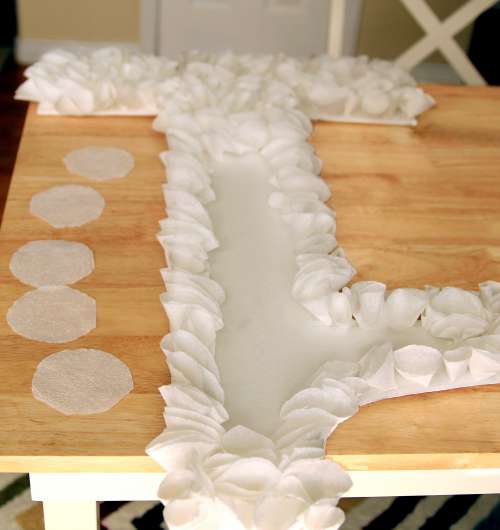
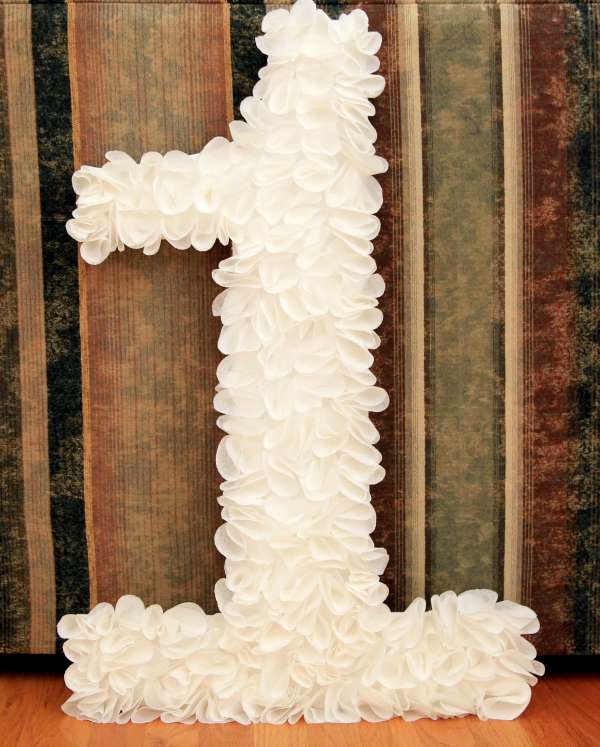
DIY projects like baking, decorations etc. can help you save a fortune and add a personal touch to even small things. They also make party preparations a fun process, wherein you can involve family and friends. But one needs to be careful with DIY projects. You do not want to get carried away and overload yourself with work. The idea is to enjoy the party and you need all the rest and time before the final day. So there is no harm in baking the cake from a cake mix, or cookies from a cookie mix or buying decorations from party supply stores. At times, the cost of DIY projects can turn out to be more if you have to buy new supplies. True, that the supplies can be used later as well, but you need to consider the budget in hand as well. And don’t forget, along with your DIY projects, you also need to look after your little one! So draw a line between what needs to be a DIY project vs what needs to be outsourced.

Plan the Menu

Ask yourself –

  • What is the guest head count?
  • What is your budget?
  • Do I need to plan for dietary restrictions like vegetarian or vegan?
  • Are the guests mostly adults or do I have kids from all age groups?

Keep the menu simple. If you are making all the food and cake at home, then you do save a lot of money. But then again you don’t want to spend all your time in the kitchen. You can order-in some of the food to make it easy on you. Catering is also a good option, if you have enough money. Don’t go overboard with the list of items, as then you end up having lot of leftovers.

Gather all Helping Hands

It is always a good idea to distribute work among family members or close friends who are willing to help. It not only makes things a little easier on you, but it also makes it fun to prepare together for the party. You can assign each of them some tasks like food, decorations, taking pictures, clean-up etc. On the day of the event grandparents, babysitter or friends can help look after the baby.

Arrange a Photographer

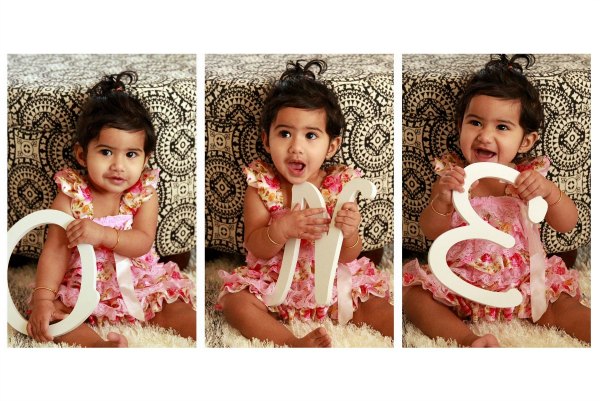
You want to capture the memories of this special day. So make sure you have a designated photographer for the day. I understand that some of us start thinking “I can take good pictures, I don’t need anyone else”. But you want to spend time with your guests and your baby and not behind the camera. You can consider hiring a professional photographer, if you can afford one. But it can also be one of your friends or relatives whom you trust can take some good pictures.

Birthday Party Favors

Ask yourself –

  • What is the age group for kids in the party?
  • Do I want a party favor that the whole family can enjoy?
  • What is the party theme?
  • What is your budget?

Be sure to count each and every kid for the party favors, regardless of the age. The return gifts can be fancy or small depending on your budget and party theme. Also, consider safe toys or gifts for kids under 3. You can also send home a party favor which the whole family can enjoy. If you have enough time, get crafty and make some fun party favors for the kids. Remember, kids enjoy receiving these small but special treats!

Enjoy the moment

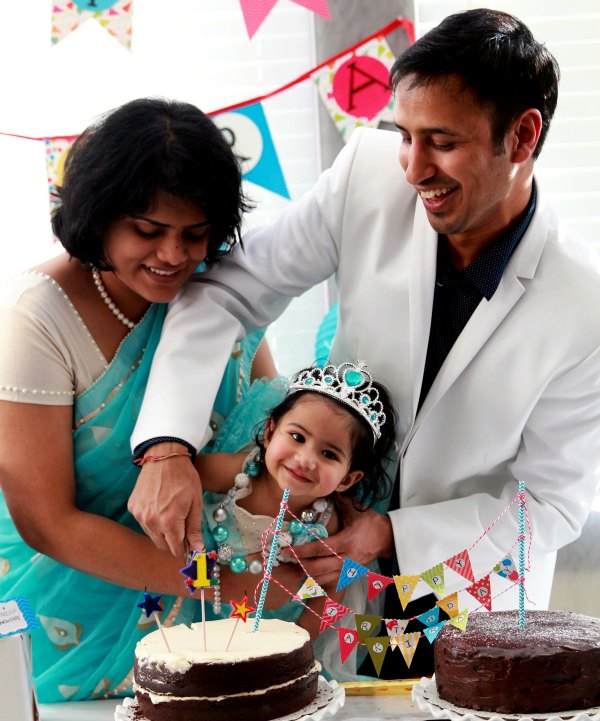
With all the hard work and planning you have done, it is now time to relax and enjoy yourself along with your baby and your guests. Just make sure that someone is freezing those precious moments for you into life long memories by taking pictures. Your baby will not remember most of this, so you want to pass down these memories to your kid when he/she grows up. Make an album or write about it, like I did for Akira’s First Birthday Party.

Have you planned a first birthday party for your precious one(s)? How was your experience? Do you have some steps or tips you would add to this list?

Winter Wonderland Birthday Party Theme

Akira’s First Birthday – Winter Wonderland Theme

Welcome to our first post! I am glad to introduce you to our blog with a post on Akira’s Birthday. It is hard to believe that she is one already! Actually, it was her birthday celebration that got me started on the idea of a blog. But it took me a good 5 months to finally be here. 🙂

Like any other parent, we were really excited about her first birthday celebration and wanted to make it special. But planning a kid’s birthday party can be a bit overwhelming, especially if it is the first one. We started the planning 1 1/2 months ahead, but were still scrambling to get things in order till the last moment. I thought it was worth sharing our planning and the experience in the next post – How to plan your baby’s first birthday.

And here is how the party turned out to be…

Party Invites

To start with, we had to finalize on the party date, venue and guest list. Since Akira’s birthday was on a Sunday this year, we decided to celebrate it on her birthday itself. Also, we decided to have a lunch party over an evening party, since she is more active during the day. This was a good decision multiple ways. She was more rested and was happy to meet all the guests. We had daylight to take some nice pictures. It allowed us enough time to prepare for the party, and also gave us enough time to clean up afterwards. Also, daytime parties are a better option in winter. I wanted to invite our friends and co-workers for the party, many of whom had not seen Akira since she was born. So it did turn out to be a big party.  Since our home was not big enough to host the party, we decided to rent a party hall based on our budget and location. Once the guest list and venue were decided, it was time to send the invitations. We used electronic invitations with RSVP and added some personal touch to it by creating a collage of images with Akira holding the letters from “One”.

Photo Prop One for First Birthday

Winter Wonderland Party Theme

Our main decision was about choosing the party theme and since it was in Jan, we thought it should be something related to winter. We were thinking about “Frozen”, but then we chose to save it for her later birthdays, when she can understand and thus enjoy it more. So we finally decided it to be a “Winter One-derland” theme and it was just perfect. Having decided on the party theme, everything started falling in its place – the color scheme, decorations, display center, desserts and party favors. We decided on a soft color palette with Whites, Blues and Greys for the theme. I wore an Indian traditional Saree in blue and Vinay wore a white tuxedo jacket with a dark blue shirt. Our little princess had a pretty blue dress and her own tiara! Thanks to my mom and aunt Sushila who actually shipped us our party dresses from India.

Cake Smash and Splash

Since Akira loves cakes, I so much wanted to have a cake smash. We decided to throw in a cake smash followed by a water splash. We arranged for some photo props and background, her second set of clothes, a smash cake (ran out of time to make one…) and a special galvanized wash tub for the splash. But as much as she loved chocolates and cakes, Akira decided not to even give them a second look on the party day. Every time we made her the touch the cake, she would go “Ewww!”. And every time she seemed to even try, she got scared by the cheers from all the people around. Finally, there was no smash, and no splash for the party! And a good lesson learnt that one should get the kiddos used to touching/feeling/smashing a cake in the privacy of your home a week or so before planning to pull it off publicly in a party 🙂

Akira's First Birthday Cake Smash

Party Treats

The party treats included:

  • Kahlua cake with Chocolate Whipped Cream frosting
  • Vegan Chocolate Cake with Chocolate Ganache frosting
  • Tiramisu Macarons
  • Espresso Snowcap cookies
  • Sugar cookies with frosting
  • Kaju (Cashew) Chocolate Rolls ~ an Indian sweet delicacy

Akira's First Birthday Cake Smash
We actually made every single party treat, and I say “we” because this time Vinay helped me out with each one of them. I was really happy with how the sweet treats came out, but I wish I had made the cookies and Macarons a bit ahead of time. We spent most of our final days to the party – Baking! Mmmm…. nothing says home like the smell of baking!! I had to try some of these recipes before the party, to see if they would come out as expected. Good thing was that Akira’s birthday is around the holiday time, so I baked and baked for the holidays. And thanks to all our friends who were happily ready to try all my experiments!

Winter Wonderland Birthday Cake

Winter Wonderland Display Center

Preparing it was one thing and displaying it another! The cakes were of course at the center of it, on top of these pretty white scalloped cake stands. The cookies and macarons were displayed in the glass jars and tray. I used some gift wrapped cardboard boxes to give height to some of the jars. I also used some filler items like rattan ball lights and holiday decorations in the jars. For the background we made a birthday banner and some paper snowflakes.

Winter Wonderland Display Center

Food

I seriously think we overdid ourselves here. There were just too many items, especially after trying the party treats. We did have lot of leftovers, but we were not complaining 😉

Menu included

  • Cheese and Crackers
  • Green Hummus & Pita Bread
  • Fish Tacos
  • Dal Makhani
  • Hot Cocoa
  • Naan
  • Chicken Korma
  • Veg Biryani
  • Shahi Paneer

Photo Prop One for First Birthday

We marked each item with DIY tags made from the leftover paper from the scrapbook. Neat right? And Vinay got super creative with water, soda & wine/beer labeling 🙂

Winter Wonderland Party Favors

Since most of our guests were adults, we decided to give a party favor that the whole family could enjoy. To go with our ‘Winter One-derland’ theme, we decided to make DIY Waterless Snow Globes as the party favor. They were real fun to make, especially since our friends Akshatha and Kishore helped us with them. Our guests also loved these cute little return gifts. I will be providing step-by-step instructions on how to make these in a later post.

Waterless Snow Globe

DIY Items

We put lots of effort to do things on our own, to make it special! Here is our list:

I will try to write about them as and when I can.

Happy Memories

Kids of this age probably won’t remember their first birthday party, so it’s up to us to capture and preserve these memories. On any other day, Vinay would have been a great candidate to be our official photographer, but on the day of the party you need all of your time. We could not afford a professional photographer, but were really happy to have our friends help click pictures for us. It was finally the time to enjoy with Akira and our guests. For us, this one single picture serves as the perfect memory of the day. Akira’s smile just made all of our effort totally worth it 🙂

Akira First Birthday

So how did you celebrate your child’s first birthday party? Are you planning a Winter Wonderland themed party as well?